This post will show you how to add a SwitchBot Blind Tilt to Home Assistant, as well as how to fix the blind cover behaviour.
Following the recent launch of the Blind Tilt, SwitchBot got in touch asking if I wanted to test a couple of units with a view to reviewing the product. As part of that, I've written a walk-through with some of my findings on the initial installation of the Blind Tilt which you can find here.
This guide shows how you can get the BlindTilt unit working with Home Assistant, as well as a workaround to get the behaviour working reliably.
It should also be noted that the process below is just as applicable to any other supported SwitchBot devices (only without the specific custom cover for the BlindTilt).
Add the Integration
Once I had a Bluetooth proxy running on an esp32 board (thanks to ESPHome), the SwitchBot Blind Tilt instantly showed up in Home Assistant under 'Integrations':
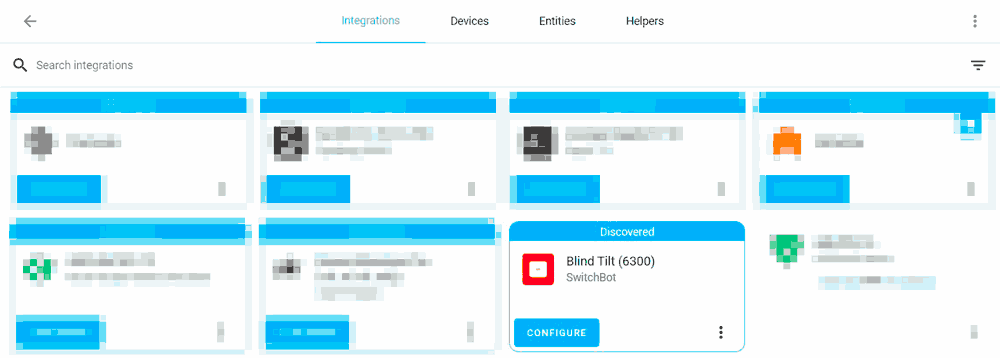
To pair the device, press and hold the pairing button on the bottom of the Blind Tilt for 2 seconds (until the white light flashes). Now start the Home Assistant setup process by clicking 'CONFIGURE' (or if it doesn't show up under discovered items, click Add Integration in the bottom right, search for and choose SwitchBot, and then follow the prompts.
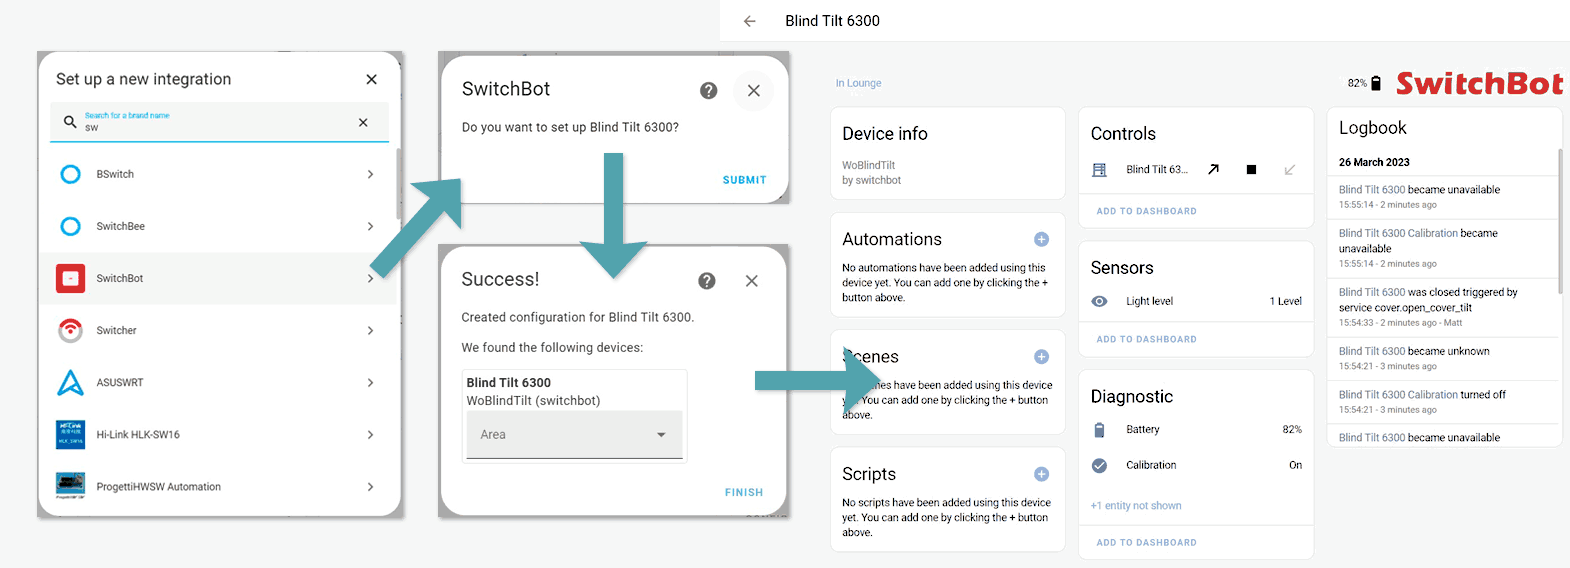
Once added, aside from the control cover entity, you'll see 2 sensors (Light level, Battery) and 1 binary sensor (Calibration). If Calibration is showing as Off, try recalibrating it using the SwitchBot mobile app.
The control cover is a bit odd. In the SwitchBot app, the control makes sense. Slide up to 'close up', halfway down to fully open the blind, and slide down to 'close down'.
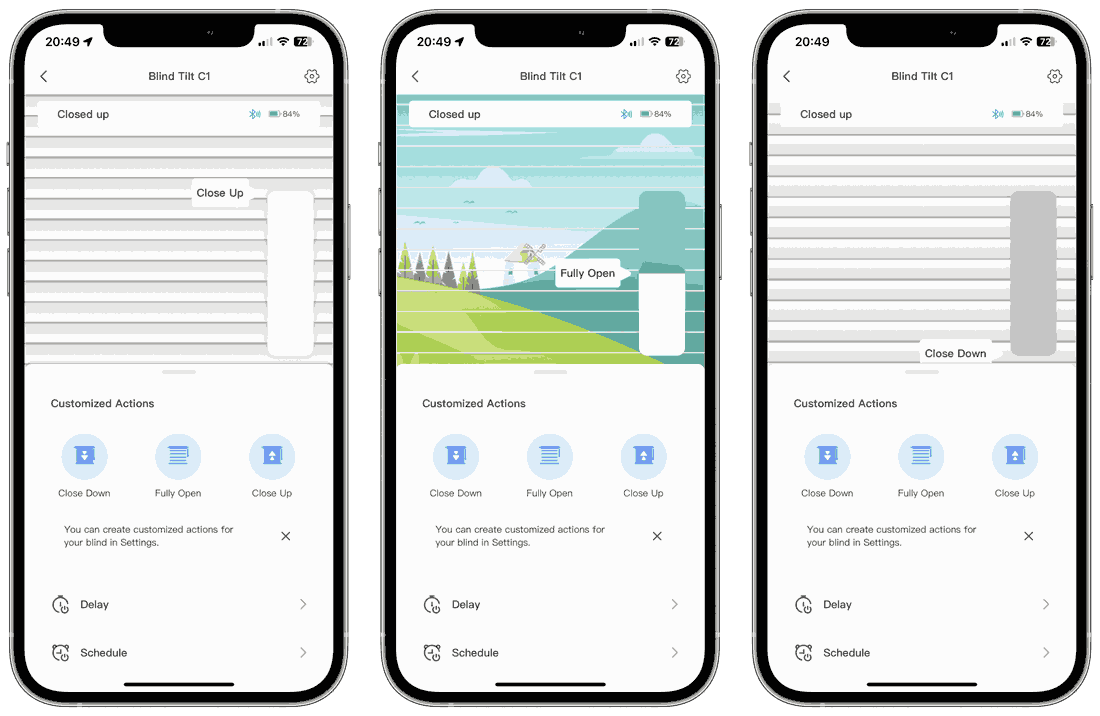
In Home Assistant it's not quite as obvious... The default cover control expects 0 to be closed and 100 to be open, but the open/close service calls do seem to understand that open is 50 (or close to it, depending on the calibration) and 0 or 100 is closed.


The 'close' action will move to 0 or 100, whichever is closer. The problem with this is that if it closes to 100, the 'open' action then can't be selected because Home Assistant expects 100 to be open.
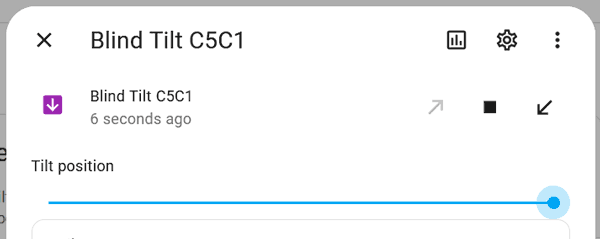
Calling the cover.open_cover_tilt service will open the blind, so as confusing as this is, I think avoiding the default cover in lieu of open/close buttons for these devices will mask any confusion.
Create a Template Cover
Looking through some Github PRs/conversations, I found this post from BelowAverageDev:
The way the blinds operate with 50%=open conflicts with the way covers are expected to behave. For example, when exposed to google home, it assumes the blinds are at 100% when open, but they are actually attilt=50. Because of this, opening to 99% will result in the blinds closing up totilt=99, but opening to 100% results in an open call settingtilt=50.
This can be worked around by creating a cover template and adding some math to scale and offset tilt values in service calls. However, this has to be done in yaml, and it can be daunting for those without any experience writing HA yaml/programming to do this (without a step-by-step guide). Owners can decide if this is acceptable.
They also included the following example that will create a new cover entity to bypass the above issues. The limitation is that it will always close down (or up if you set tilt_position: 100), but the benefit is that the open and close actions will always behave as you expect them to.
# Example by Github user BelowAverageDev

example_blinds:
  device_class: blind
  friendly_name: Example Blinds (Simple Down)
  open_cover:
    service: cover.set_cover_tilt_position
    data:
      tilt_position: 50
    target:
      entity_id: cover.example_blinds
  close_cover:
    service: cover.set_cover_tilt_position
    data:
      tilt_position: 0
    target:
      entity_id: cover.example_blinds
  position_template: >
    {{ int(states.cover.example_blinds.attributes.current_tilt_position)*2 }}
  set_cover_position:
    service: cover.set_cover_tilt_position
    data:
      tilt_position: "{{position/2}}"
    target:
      entity_id: cover.example_blinds
To use this example, change the first 'example_blinds' line to what you want your new cover to be called, then find and replace all other instances of cover.example_blinds with your device entity. Here is a working example:
cover:
  - platform: template
    covers:
        blind_tilt_c5c1_tmpl:
          device_class: blind
          friendly_name: Example Blind
          open_cover:
            service: cover.set_cover_tilt_position
            data:
              tilt_position: 50
            target:
              entity_id: cover.blind_tilt_c5c1
          close_cover:
            service: cover.set_cover_tilt_position
            data:
              tilt_position: 0
            target:
              entity_id: cover.blind_tilt_c5c1
          position_template: >
            {{ int(states.cover.blind_tilt_c5c1.attributes.current_tilt_position)*2 }}
          set_cover_position:
            service: cover.set_cover_tilt_position
            data:
              tilt_position: "{{position/2}}"
            target:
              entity_id: cover.blind_tilt_c5c1
And once you reload your configuration, you'll have a working cover entity:

Once you've added this, you can still call the cover.set_cover_tilt_position service with a % value. You might have a button that uses this to set a slight tilt up to block the sun's glare (or better, combine weather forecast, time of year, luminance value from the blind itself so automatically call it...).
This cover template workaround is a bit frustrating but seems to work much more reliably than the default. In conjunction with creating some other custom presets, it's probably good enough until SwitchBot can improve the functionality (or documentation, at the very least).
Adding Multiple Blind Tilts
Adding a second device is as simple as the first. Reading the official SwitchBot integration instructions made me think it would be more complicated (it says about making a note of the Bluetooth MAC address) but in reality, you put the device into pairing mode, add the new SwitchBot device, and it shows up. The default name has the last 4 characters of the BT MAC address appended (as opposed to the SwitchBot iOS app with appends the last 2 characters of the MAC address).
Basically: If you're installing and adding one device at a time, you won't need to worry. Maybe knowing the MAC address of the device in each location may help with future troubleshooting...
What Next?
Adding the Blind Tilt to Home Assistant adds a whole world of extra possibilities for creating automations that the standalone SwitchBot app can't compete with. The BlindTilt also adds a potentially useful sensor in the form of the light level meter. Making the blind partially close when the TV is on, the sun is low and the light level is over a certain threshold used to be a pipe-dream, but no longer!
Alternatively, you can add any of the other supported SwitchBot devices using the same method as above. As a side note, this was my first experience using Bluetooth proxies, and I was pleasantly surprised at how responsive and reliable the control was.
If I've missed anything, or if you want to share a cool blind/curtain automation, please leave a comment or send me a message at @techbits@sudo.cat or @techbitsio.
