This guide will show you the simple steps needed to turn your ESP32 into a Bluetooth proxy ready to add Bluetooth devices to Home Assistant.
Bluetooth proxies were added to ESPHome in September 2022, and given Nabu Casa's acquisition of ESPHome in 2021 and the deep integration that's in place, it means that Bluetooth proxies function as well as if the Bluetooth was integrated into the device running Home Assistant.
Do you need a proxy?
If you're running on a Raspberry Pi or other hardware with integrated Bluetooth, you might not need to set up any proxies, but the reason you might want to could be either range or reliability.
Range
A Bluetooth proxy can be placed anywhere with Wi-Fi or ethernet (depending on the ESP32 that you have), possibly closer to Bluetooth devices than you can locate the system running Home Assistant.
Reliability
If you have lots of Bluetooth devices, you might find that you can't control them all simultaneously with only one Bluetooth radio. More Bluetooth interfaces available to Home Assistant will spread this load.
Proxy Pre-requisites
You'll need to be running at least version 2022.9 of Home Assistant (although I'd recommend updating to the latest version for updated device compatibility—active Bluetooth was added with Home Assistant version 2022.10, for example) with the ESPHome addon installed.
Bluetooth proxy requires Home Assistant 2022.9 or later. ESPHome 2022.12.0 and Home Assistant 2022.12.6 or later is recommended.
-- ESPHome Docs
You will, of course, also need at least one ESP32. I grabbed the first one I found in a drawer (a fairly standard ESP32 development board), but if you don't already have one:
Recommended ESP32 Devices
ESPHome recommends an Ethernet ESP32, to allow the radio to be dedicated to Bluetooth traffic.
If using this device, or another different device, you'll need to change
board: esp32dev to match, in the case of the M5Stack: board: m5stack-core-esp32.Flashing an ESP32 the Easy Way: WebSerial
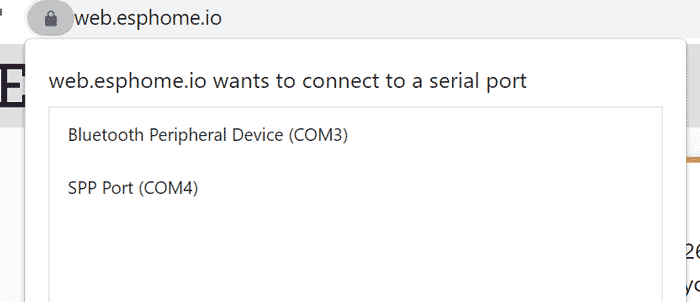
Both of the following methods involve using a web browser that supports WebSerial (currently only Edge, Chrome and Opera). You'll also need the driver for your particular ESP32. When prompted, if you don't see your device listed, click 'Cancel', and you'll get a popup with an explanation as well as links to the drivers for the most common devices.
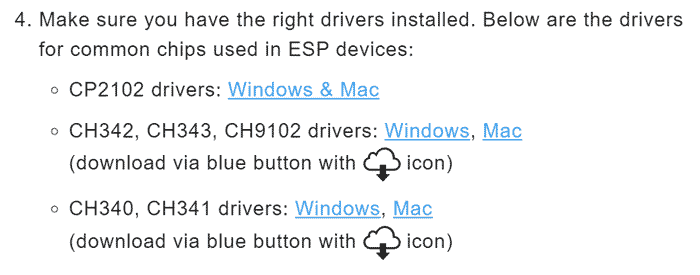
- CP2102 drivers: Windows & Mac
- CH342, CH343, CH9102 drivers: Windows, Mac
- CH340, CH341 drivers: Windows, Mac
Note: If your device isn't listed, please leave a comment and I'll add a table for other common devices and their respective drivers.
If you're not sure which one your device needs, Windows users can check Device Manager. Alternatively, check the product information from the retailer, or brute-force it by installing all of them...

Using Home Assistant
For this, your connection to Home Assistant/ESPHome instance needs to be encrypted (i.e. using https).
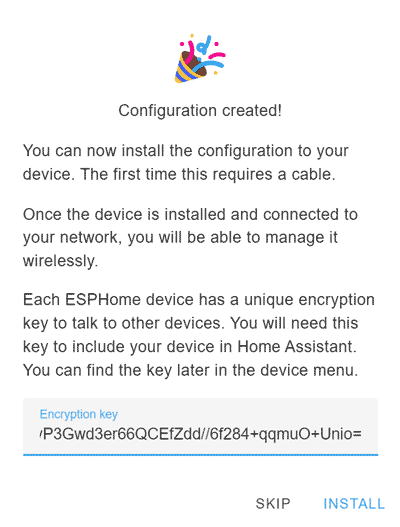
Go into ESPHome, click the 'New Device' button in the bottom right corner and give your proxy a name. When you add your first device, you'll be prompted to enter Wi-Fi credentials which will automatically get added to the secrets file. For subsequent ESPs, you'll just get a message explaining that it's going to use the previously saved secrets.

Click Next, read the next note and click CONNECT (this is when you'll be prompted with the connect to WebSerial popup shown in the section above). If you need to install the driver at this point, do that, then choose the device.

Failed to initialize. Try resetting your device or holding the BOOT button while selecting your serial port until it starts preparing the installation.
Depending on the board you're using, you might get the above 'failed to initialize' message, in which case follow the advice, hold the BOOT button while connecting the USB cable (fiddly...), click CONNECT and keep holding until you see the preparing installation message.
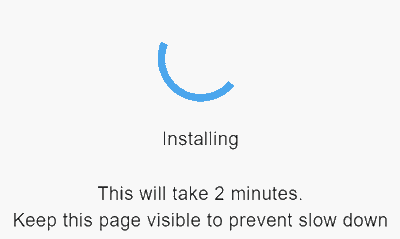
After preparing the installation, it'll erase anything already on the ESP and start to install.
Once finished, ESPHome will try to find your device on the network. If it fails, it might be that you need to enable mDNS on your network, or failing that, you could set a static IP for the ESP.
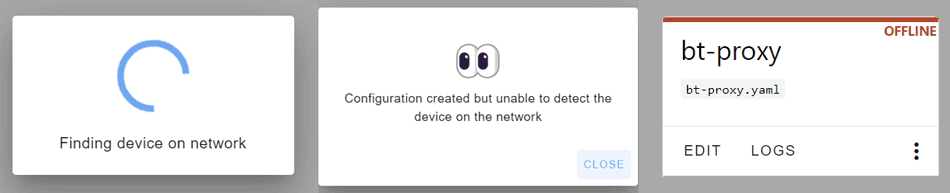
Set a Static IP
Find the configuration and click Edit. The default configuration ESPHome created for you will look like this:
esphome:
  name: bt-proxy
  friendly_name: bt-proxy

esp32:
  board: esp32dev
  framework:
    type: arduino

# Enable logging
logger:

# Enable Home Assistant API
api:
  encryption:
    key: "r3yWlwWBAHKsLMcVpR3+QF96f0towDMBgf/dJsiiEsI="

ota:
  password: "f20bb82d925ff5c2e3f2517008297f6f"

wifi:
  ssid: !secret wifi_ssid
  password: !secret wifi_password

  # Enable fallback hotspot (captive portal) in case wifi connection fails
  ap:
    ssid: "Bt-Proxy Fallback Hotspot"
    password: "BUU53kEn0gW5"

captive_portal:
To set a static IP, add the following to the Wi-Fi section:
wifi:
  ssid: !secret wifi_ssid
  password: !secret wifi_password

  fast_connect: True # Optional. Required if connecting to a hidden SSID
  manual_ip:
    static_ip: 192.168.10.41
    gateway: 192.168.10.1
    subnet: 255.255.255.0

  ap:
    ssid: "Bt-Proxy Fallback Hotspot"
    password: "BUU53kEn0gW5"
Click SAVE in the top-right corner, then INSTALL.
When asked 'How do you want to install..', choose 'Plug into this computer'. Choose the device when prompted (holding BOOT until you see 'preparing installation', if required).
The lines below added to the end of the ESP configuration are all you need to turn your ESP32 into a Bluetooth proxy.
esp32_ble_tracker:
  scan_parameters:
    interval: 1100ms
    window: 1100ms
    active: true

bluetooth_proxy:
  active: true
The interval and window values are some defaults recommended on the ESPHome website. active: true is optional (defaults to false) but is required if you want to use devices with active Bluetooth connections in addition to passive BLE devices.
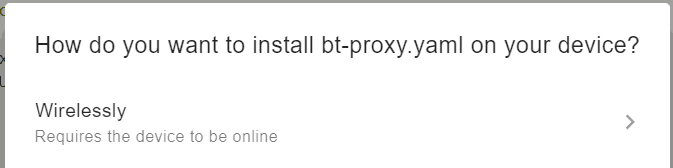
Once again, click SAVE, then INSTALL. You should now be able to install the configuration by choosing the 'Wirelessly' option.
Using ESPHome Web
If your Home Assistant/ESPHome instance isn't using https, you can use the ESPHome Web portal.
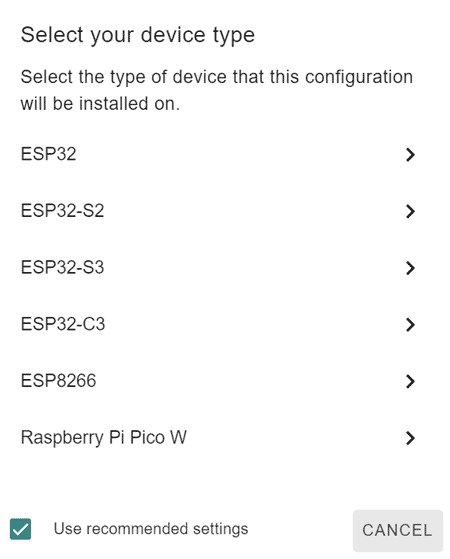
Start by adding a new device in your ESPHome installation, following the same procedure as if you were using the method above, except when presented with the prompt to CONNECT, choose SKIP THIS STEP.

You'll choose the device type next, choose ESP32 leaving 'Use recommended settings' checked (if the process doesn't work first time, you can try unchecking this and manually selecting the board type in the resulting step).
While you're here editing the config, you could add the Bluetooth proxy code too to save a step later.
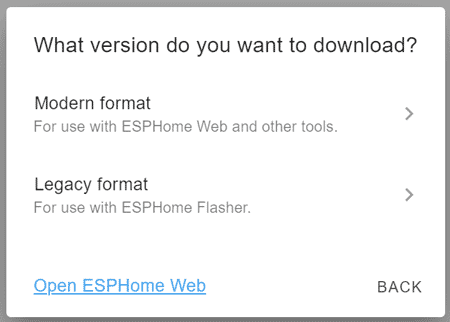
choose INSTALL, but choose the fourth option: Manual download. For ESPHome Web, you want to download the modern version, but the legacy format is still supported if you want to use ESPHome Flasher or similar.
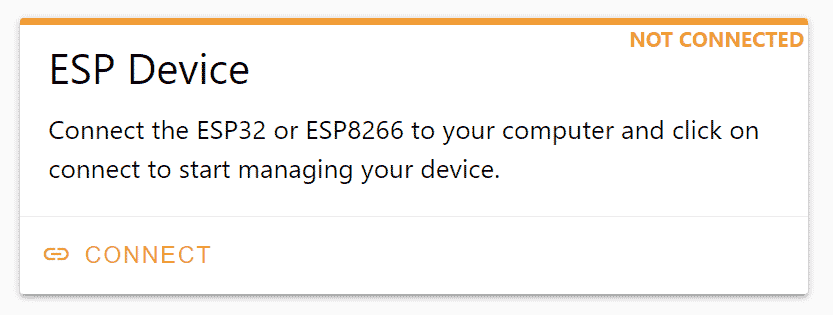
Now you have your config, go to web.esphome.io using a WebSerial-compatible browser, and follow the prompt to CONNECT.
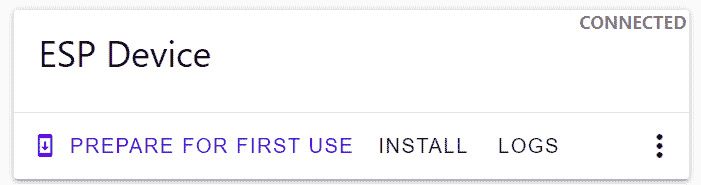
As we've already prepared a config, we'll choose INSTALL (while holding BOOT, if applicable).
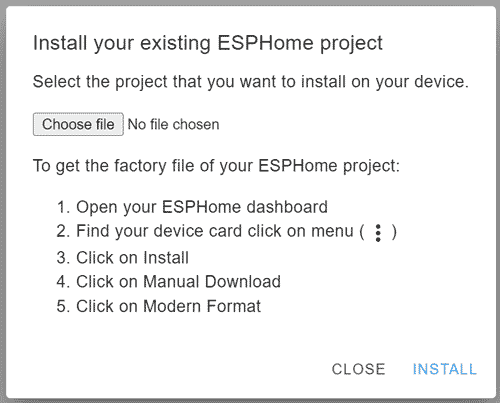
Upload the .bin file we just downloaded from our local ESPHome installation and click Install, and the process will begin.
Because we created the config in ESPHome, once the device has been flashed, it will show up in the dashboard like normal. If you didn't already add the Bluetooth proxy config options, you can now edit from ESPHome, adding the Bluetooth config lines from above, then click SAVE, INSTALL and this time choose to install Wirelessly.
Flashing the ESP32 Manually
If you're not using a WebSerial-compatible browser, you can follow the steps for ESPHome Web above as far as creating the config, and when you choose Install -> Download, then choose the legacy option.
Using ESPHome Flasher (or a similar ESP flashing tool) you can flash the ESP offline. It's fairly straightforward (just follow the prompts).
Add the Proxy to Home Assistant
Finally, we can add the new device to Home Assistant!
Go into Home Assistant Settings -> Devices & Services.
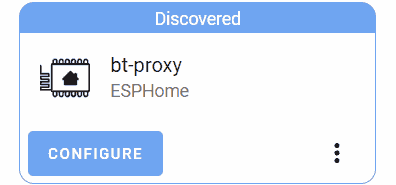
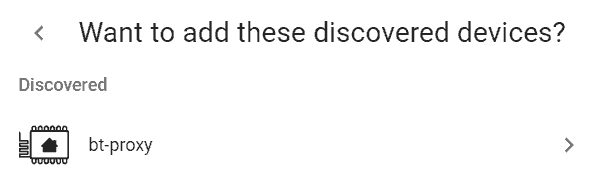
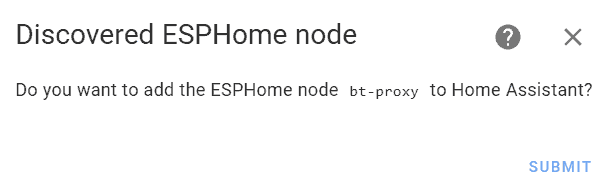
You might see your new device in the Discovered section, but if you can't see it click the ADD INTEGRATION button in the bottom-right. Search for and choose ESPHome, then your new device should be listed. Select it and when asked if you want to add it, click SUBMIT.
You'll get a success message and a prompt to assign it to an area. Click FINISH to close the window, and that's it–you've added a Bluetooth proxy to Home Assistant.
You can now start adding Bluetooth devices to your Home Assistant server. If you head back into Integrations, you might even see some things pop up.
What next?
If you didn't previously consider Bluetooth to be a good protocol for Home Assitant, you're not alone. I was pretty sceptical, but having played around with it, I'm continually surprised at how reliable it seems to be.
The next step is to try adding some Bluetooth devices, whether you have some buried in a drawer, or you're on the lookout for something new! I have a couple of guides on SwitchBot devices (first up: Blind Tilt) coming soon, so check back for that!
If you notice any obvious mistakes, please leave a comment or send me a message at either @techbits@sudo.cat or @techbitsio. Given how ubiquitous Bluetooth is, I'd love to hear some crazy integration stories!

