
This guide will show you how to add one or multiple static IPs to your Ubiquiti UDM-Pro (or other compatible UniFi product).
I have recently signed up with a new broadband provider (Cuckoo Broadband - review on the way), one which offers some pretty cool features for a home internet provider. Well, one cool feature: static IPs. Yes, IPs - plural.
Previously, the only ISP that I was aware of that offers even one static IP (and I believe still does) is Plusnet. However, because Cuckoo uses TalkTalk Business broadband for its services, it seems that Cuckoo is happy to enable this service for customers.
Talking to their very helpful customer support team before signing up, I found out that they offer 1 IP or blocks of 4, and however many you choose, they cost £1 each per month. I have a few ideas for projects, and figuring that the first IP will replace the DHCP address of the modem/WAN interface, I went for 4.
There's no option to sign up for this in the Cuckoo account, you have to ask the customer support team to add them to your account, but within a space of a couple of hours, the very helpful James provided me with a /30 CIDR block.
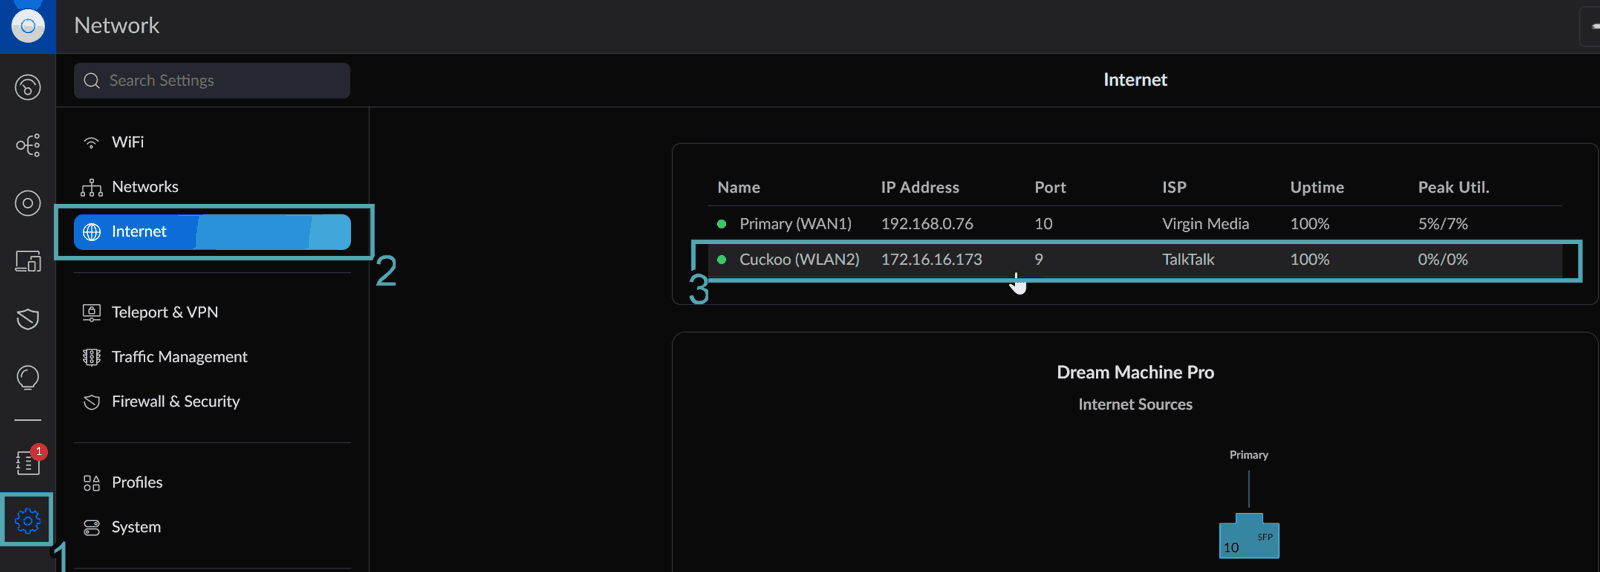
On the UDM Pro, setting the IPs is fairly straightforward: Login to your UDM (or cloudkey if you're using something other than a UDM/Pro), go to Settings -> Internet, then select the WAN interface you want to add the static IPs to.
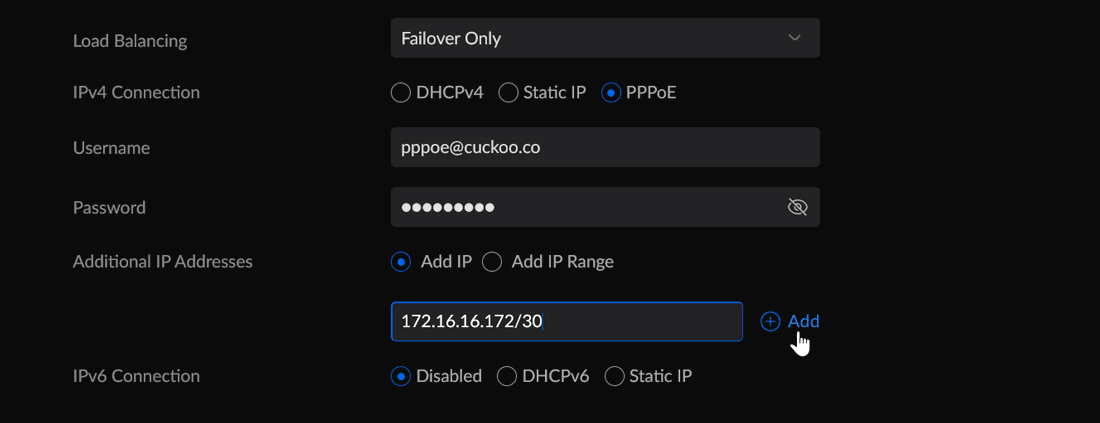
Scroll down until you find Additional IP Addresses (almost at the bottom). Here you can add an IP, or a range–I tried entering as a range and kept getting "IPv4 CIDR range is not valid". Both of these options require addresses to be entered in CIDR block formats (if you had 4 non-sequential IPs, you'd enter them as ipaddress/32).
Enter each IP, or the range and click add for each one. Once done, apply the changes.

The change should be pretty instant, and to check, from your local network, ping the added IPs (you're accessing them locally, so they should all ping):
PS C:\Users\techbits> 172..175 | % {ping -n 1 -w 20 172.16.16.$_} | Select-String -Pattern 'Reply from'

Reply from 172.16.16.172: bytes=32 time<1ms TTL=64
Reply from 172.16.16.173: bytes=32 time<1ms TTL=64
Reply from 172.16.16.174: bytes=32 time<1ms TTL=64
Only three responded, so I went back in and changed the addresses to 2 /31's, which seemed to do the trick:
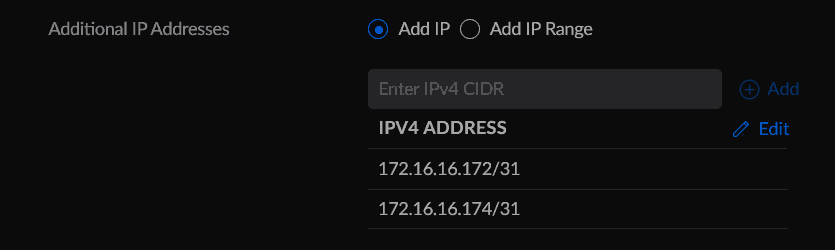
PS C:\Users\techbits> 172..175 | % {ping -n 1 -w 20 172.16.16.$_} | Select-String -Pattern 'Reply from'

Reply from 172.16.16.172: bytes=32 time<1ms TTL=64
Reply from 172.16.16.173: bytes=32 time<1ms TTL=64
Reply from 172.16.16.174: bytes=32 time<1ms TTL=64
Reply from 172.16.16.175: bytes=32 time<1ms TTL=64
What next?
That's all there is to it! If anyone can explain why the /30 range didn't work, please leave a comment or let me know at @techbits@sudo.cat or @techbitsio.
Next up will be some cool little projects where you can utilise these static IPs, so check back soon.