
This guide will show you how to setup the Hildebrand Glow SMETS1/2 monitor with MQTT and how to enable it with Home Assistant's Energy Dashboard.
The Glow Display and CAD from Hildebrand Technology Limited is a device that's meant to replace the default provider-supplied smart meter IHD (in-home display), as well as provide additional functionality and data through also being a CAD (consumer access device).
I won't dwell on much of the background here (check out the upcoming review for that), but I will go over how to get it set up, get it streaming data via MQTT, and get that information into Home Assistant.
When Ordering
First of all, setup really begins when you order the device. Hildebrand/Glow says to include the username (email address) of your Glow Bright account in the notes field of the order. That way, they can pre-link the device to your smart meter meaning less setup when you receive the unit.
If you don't already have an account, you'll need one, and it seems the easiest way to get this setup is to download the iPhone/Android app, create an account, and follow the instructions to link this to your smart meter. Once that is setup, you'll know that the Glow Display/CAD is compatible with your meter.
Initial Setup
After shucking the simple cardboard packaging, just attach the back and power cable and hit hold the power button for a few seconds.
Once on, it'll start trying to talk to your meter using the ZigBee 1.2 SEP (smart energy protocol). This took a couple of minutes for me, so I set the Wi-Fi configuration while I waited.
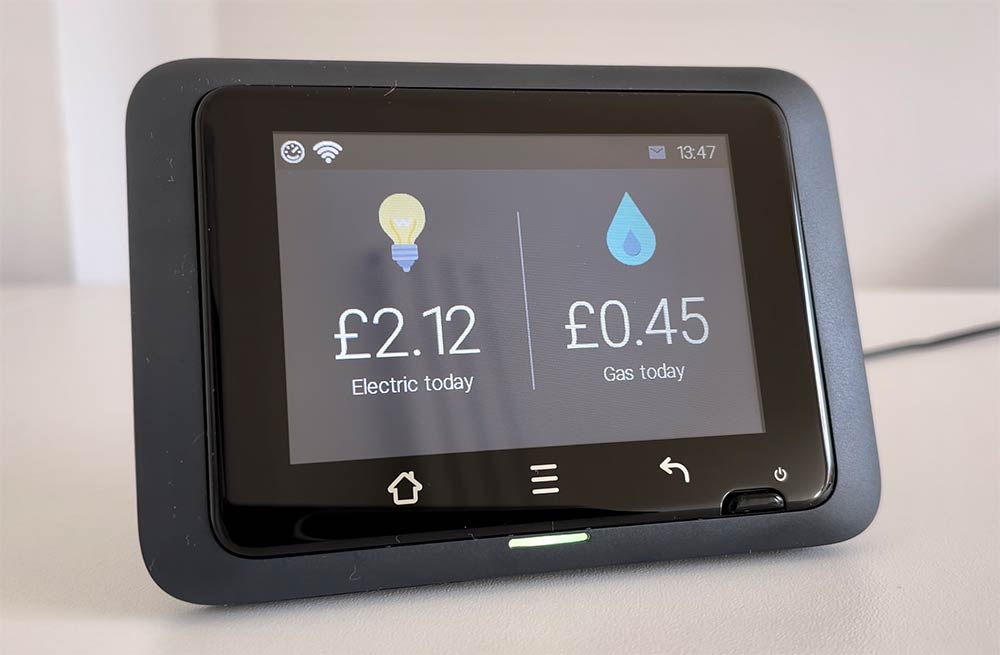
Eventually, it connected to both gas and electricity meters and started to display the ever-ticking energy usage.
MQTT Configuration
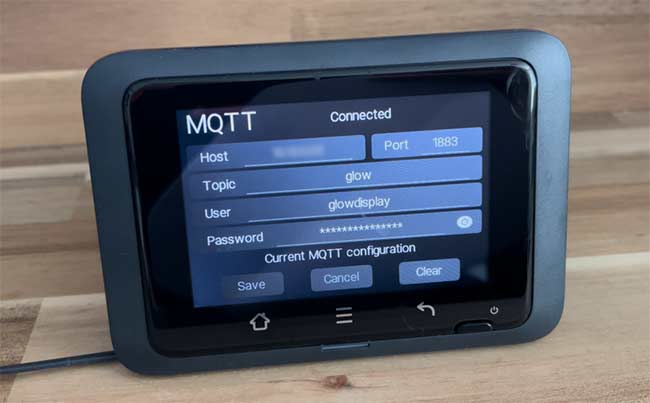
The next step is MQTT setup. In the menu, go to metering, and then MQTT. Enter the details of your broker (or home assistant IP if you're using the Mosquitto addon), username, password. Leave the topic as glow, or if you change it, make sure you change it in all of the subsequent configurations (seriously, I'd leave it as 'glow'). Hit save, and you should see that it connects.
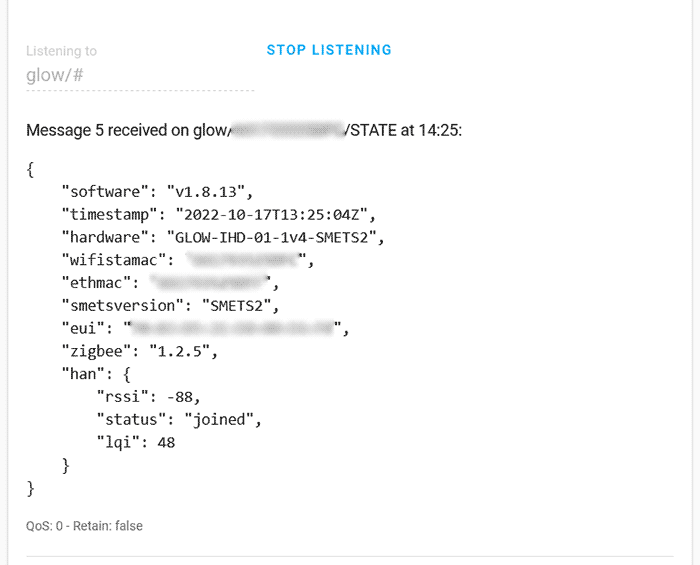
You can test this in Home Assistant by going to yourhomeassistant:port/config/mqtt and finding 'Listen to a topic' and entering 'glow/#'. You should see some updates appearing after hitting subscribe.
If you're not using Home Assistant, you can test this in an application like MQTTBox, or similar.
You should get an update pretty quickly—the device sends electricity usage every 10 seconds (gas only every 30 minutes).
Once you're getting the stream of data from the device, you can start displaying it in Home Assistant.
Home Assistant Setup
All credit for this part goes to Robert A. who has documented the sensor configuration and the energy cost sensor templates over on this thread.
In short, copy the mqtt section (yes, it's quite long... copy it all) and the template sections into your configuration.yaml file. Find and replace the word 'REDACTED' with the ID of your device. The ID is the mac address without any colons. You can work this out from the details on the unit itself, or from the MQTT messages you saw when testing previously: the topic will have the ID after 'glow/', e.g. the ID will be 12 hexadecimal characters.

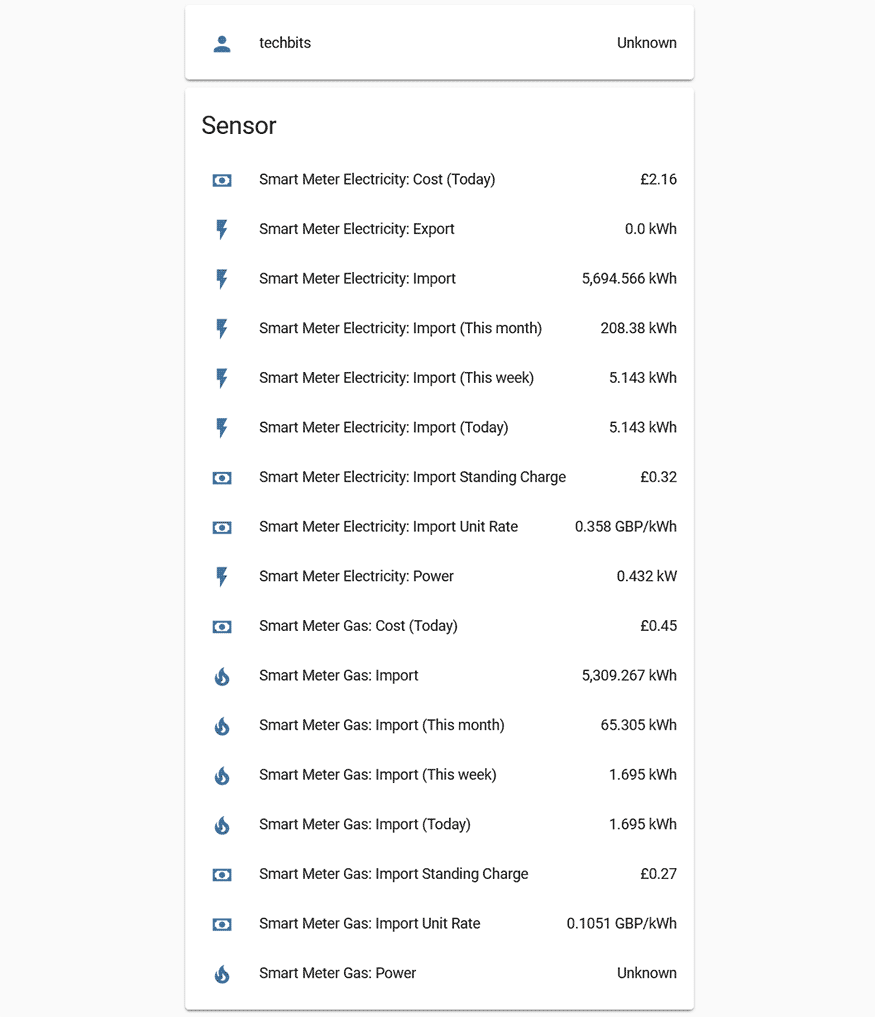
Once you've inserted your ID, save the config. Restart/reload the Home Assistant config, and you should see a bunch of new entities.
The last step is to that our new entities, and configure Home Assistant's Energy monitoring functionality.
In Home Assistant, click on Energy from the left menu bar and follow the guide.
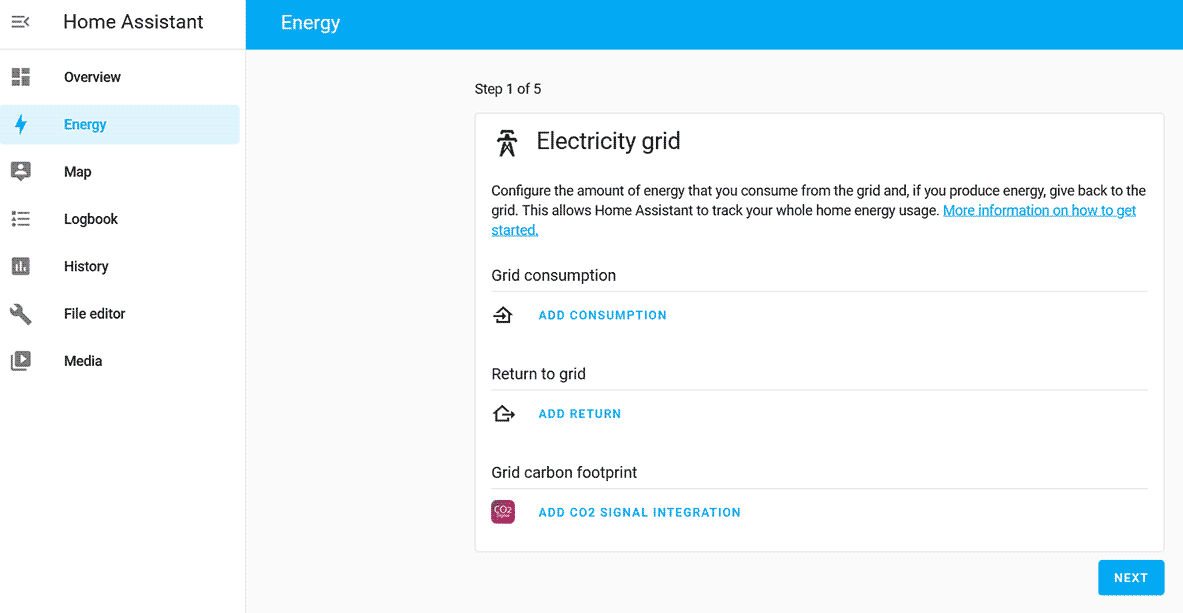
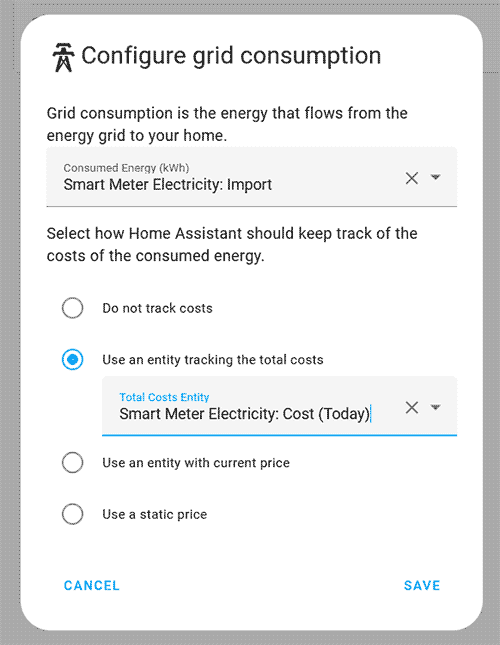
For Step 1, click Add consumption and set the consumed energy to be Smart Meter Electricity: Import, then under 'Use an entity tracking the total costs', select Smart Meter Electricity: Cost (Today). Click save, then next.
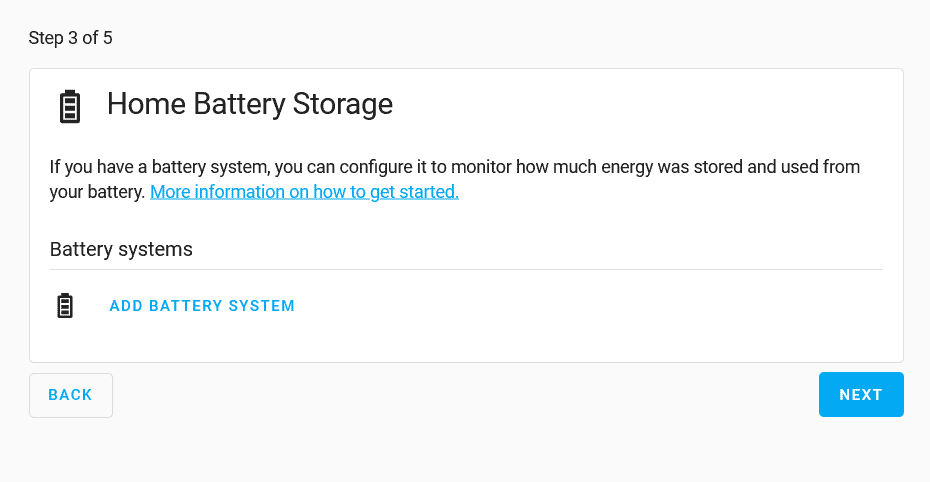
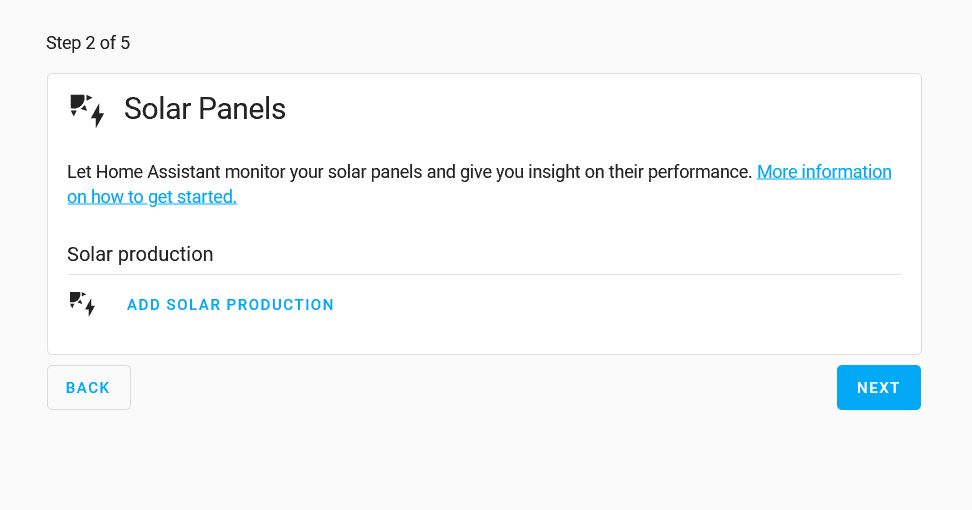
Skip past steps 2 and 3 (unless you need to setup solar and battery power).
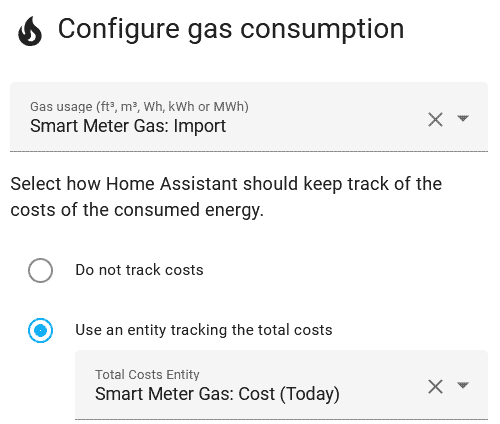
Step 4 is the same as step 1, but for gas, so replace the entities accordingly: set 'Consumed Energy' as Smart Meter Gas: Import and under the second check-box, Smart Meter Gas: Cost (Today).
Click Save, then next. Step 5 might be useful if you have devices that report their power already, as you'll be able to split this out of the total amount of power.
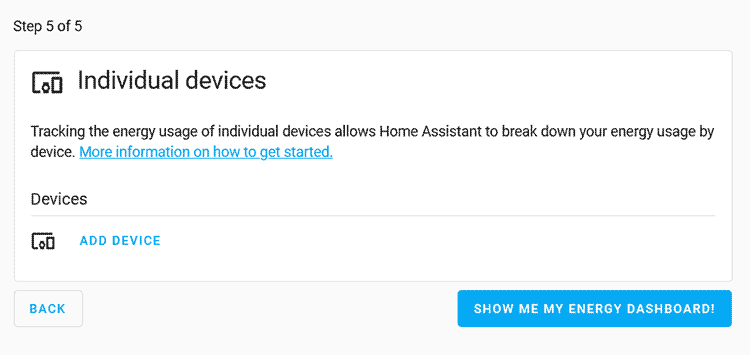
Add, or don't add devices here, then click 'Show me my energy dashboard!'
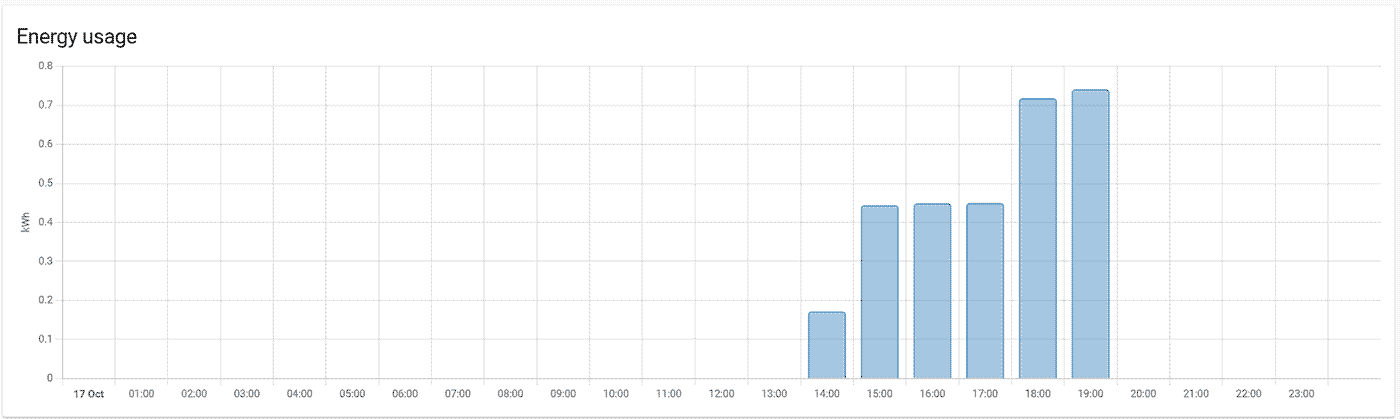
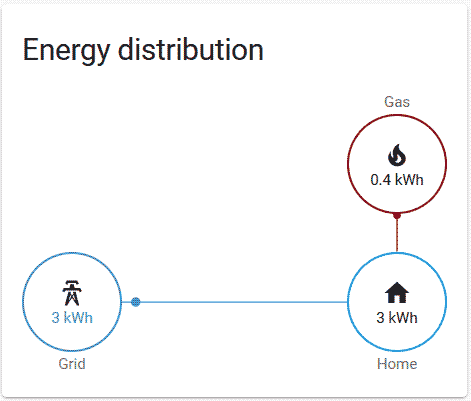
You'll see... nothing, maybe. Give it a few hours to populate to avoid crushing disappointment, and you'll end up with something like:
That's it! You've setup your Glow IHD, set it to send data to your MQTT broker, and enabled the really cool energy functionality in Home Assistant. This is just the start... once you begin adding device energy consumption, you'll be trying to track down where those last few watts went. Don't say I didn't warn you.
If there's anything I've missed or you'd like to add, please add a comment below, or you can say hi over at @techbitsio.