While checking out an ASUSTOR NAS (the Lockerstor 6 Gen2), I tested various configurations of storage and storage types. As part of that, I set up iSCSI targets for a Proxmox cluster, to enable the use of High Availability.
This article details how to create iSCSI targets (with CHAP authentication) and LUNs on an ASUSTOR NAS that is running ADM (this process was tested on version 4.2.7.RRD1).
If you're already happy with how to create the iSCSI Target and LUN, you can head straight to the next post: Proxmox: iSCSI LUN as Shared Storage
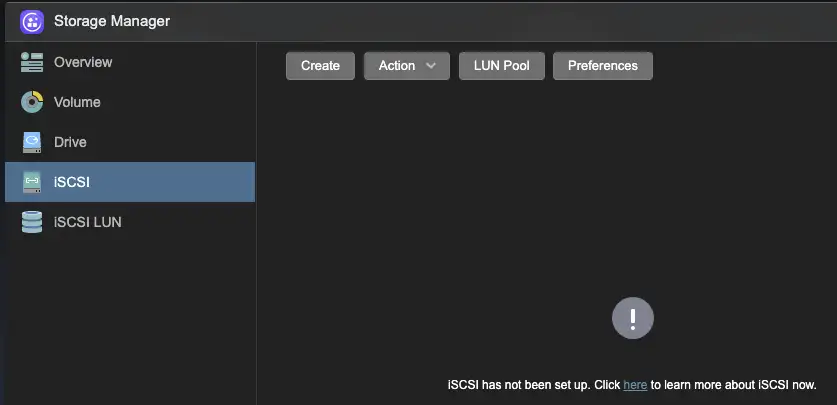
Storage Manager
After logging into ADM, go to Storage Manager then iSCSI.
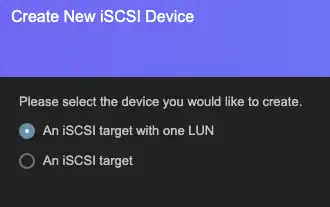
Create iSCSI Target
Click Create -> leave An iSCSI target with one LUN selected -> Click Next.
Enter a Target name (useful for identifying the target in future if you have more than one). This becomes part of the unique IQN (iSCSI Qualified Name).
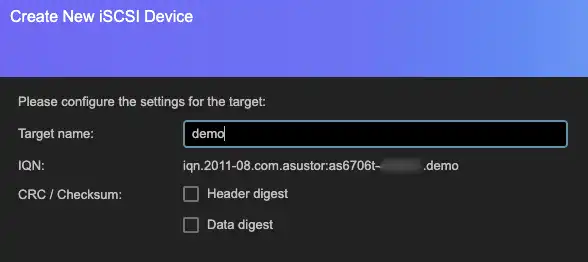
There are also options for integrity checking (CRC / Checksum). Enabling this is likely to drop your network throughput rate to/from a client but with the benefit of reducing the chance of transmission errors. There is some interesting reading on this subject, but I'm going to take the easy way out and say it's outside the scope of this article, but I invite you to read this ipspace post!
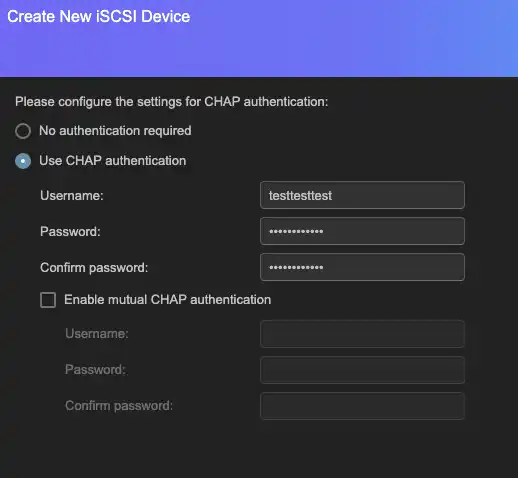
Authentication
Next up: Authentication. You should obviously use this. For this example, we're going to use CHAP (Challenge-Handshake Authentication Protocol). To authenticate, we enter the credentials on the initiator (client) configurations when connecting to the LUN(s). Mutual CHAP is where both sides enter credentials for the opposite side.
Create iSCSI LUN
On the next page, we'll create a new LUN and choose a name for it. This will show up on the hypervisor, so giving it a descriptive name is probably a good idea.
If you have multiple storage volumes, select where the LUN should be created.
This provisioning with let you create the full size of your volume without having to allocate the disk space until it is required by the guest operating system. It's usually a good idea to say Yes to this, unless you want to be very sure of the available space for each guest, or you're particularly worried about disk fragmentation (warning: big internet arguments on the pros and cons of this, performance benefits etc. I'm not getting involved. Have a link.)
Snapshot support is worth enabling, as you might decide to use it, but don't have to.
Finally, LUN size - if you're using thin provisioning, you can set a realistic/generous capacity. Then click Next.
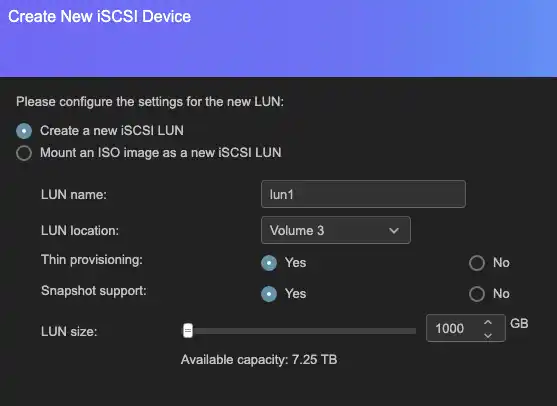
You'll be prompted with a final confirmation screen–check you're happy with everything and choose Finish.
Summary
The steps above detail how to create an iSCSI Target (using CHAP authentication) and LUN on an ASUSTOR NAS running ADM. While it's geared towards the ASUSTOR NAS operating system, the theory is transferrable to most other NAS manufacturers (such as Synology and QNAP) and storage systems.
Next up, we'll connect to this LUN from our initiator (or initiators) if we're creating a highly-available cluster: Proxmox: iSCSI LUN as Shared Storage
This is a fairly low-level entry to iSCSI, but if you think there's anything I've overlooked, please leave a comment or let me know at @techbits@fosstodon.org.