The workflow for deploying theme changes to a Ghost site can seem a bit convoluted at first glace, especially to those who are used to directly editing theme files on a WordPress installation.
Ghost requires a .zip file to be uploaded through the admin interface. What happens if you edit the files in the theme directory? Nothing...until you restart Ghost.
Instead of picking one of these, there's a much more powerful third option: deploy using Github actions.
What is a Github Action?
At the simplest level, a Github Action is a workflow that performs a job once an event is detected.
Github provides VMs & containers to run scripts/jobs when your event is detected.
Creating an action would be a whole project in itself, but fortunately, the Ghost team maintain such an action which utilises the Ghost API functionality built into your site.
Not only will it deploy your theme, but it will check it for errors, even giving you a bit of a clue where to look to fix the issue.
Creating the Ghost Integration
Login to your Ghost admin dashboard, go to Settings, then choose Integraions under Advanced. Choose + Add Custom Integration and give it a descriptive name.
Either keep this page open, or make a note of the Admin API key and URL.
Setting up the Repository
Create a Repository
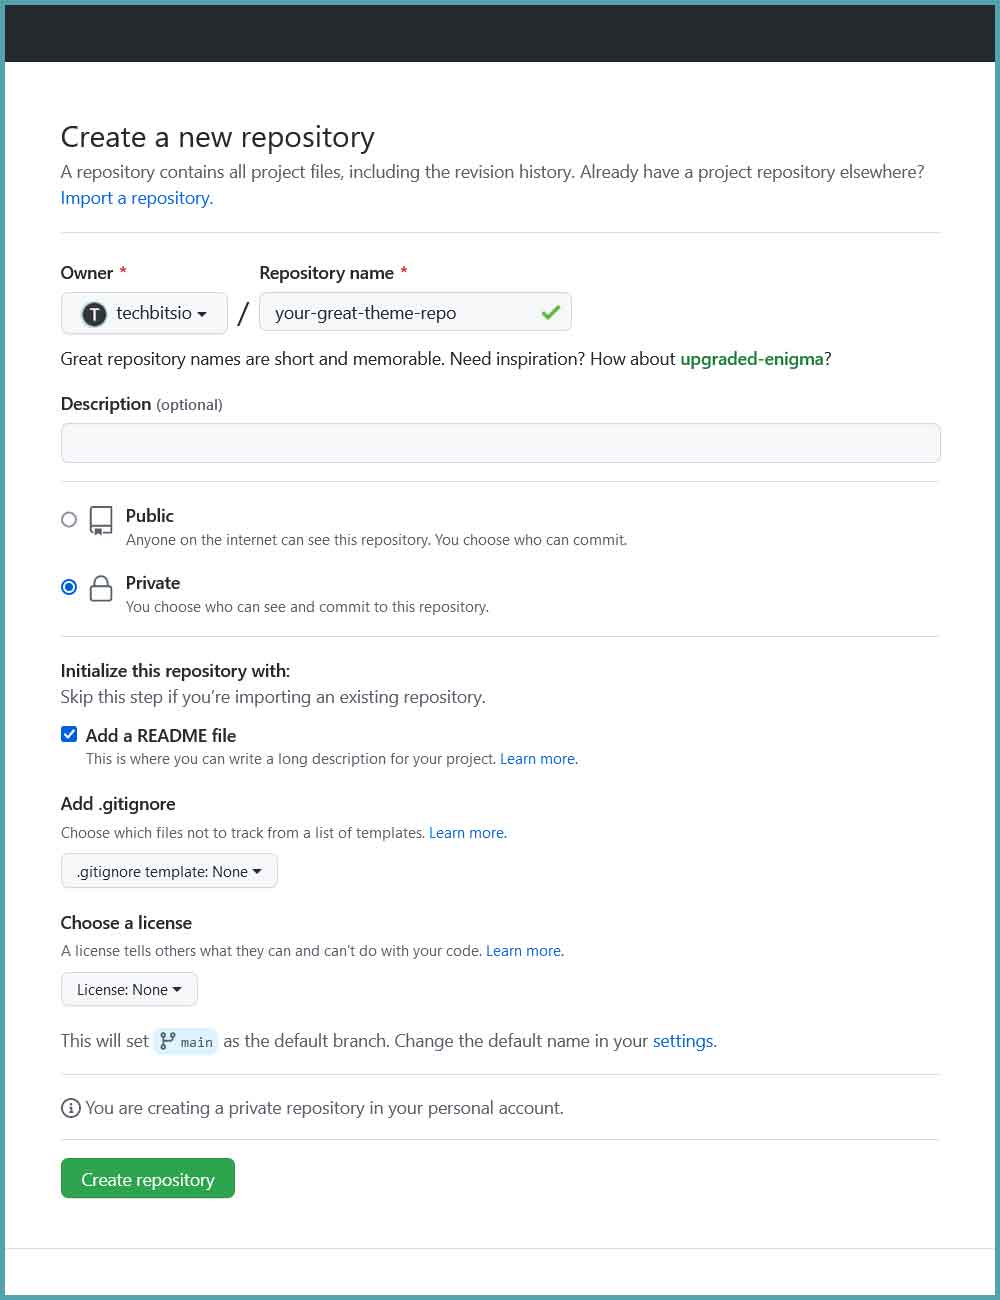
- Log into your Github account and create a new repository. Make sure you set it to
Privateunless you have a very good reason for not doing so. - The name of the repository doesn't matter - it's just so we can identify it.
- Creating a readme file can be useful if you want to keep a note of site settings (especially header/footer code injection).
- As it's a private repo, we're not going to add our own license.
Add the Action Secrets
Once you've created the repository, go into the settings of that repo. Under Secrets -> Actions, choose 'New repository secret'
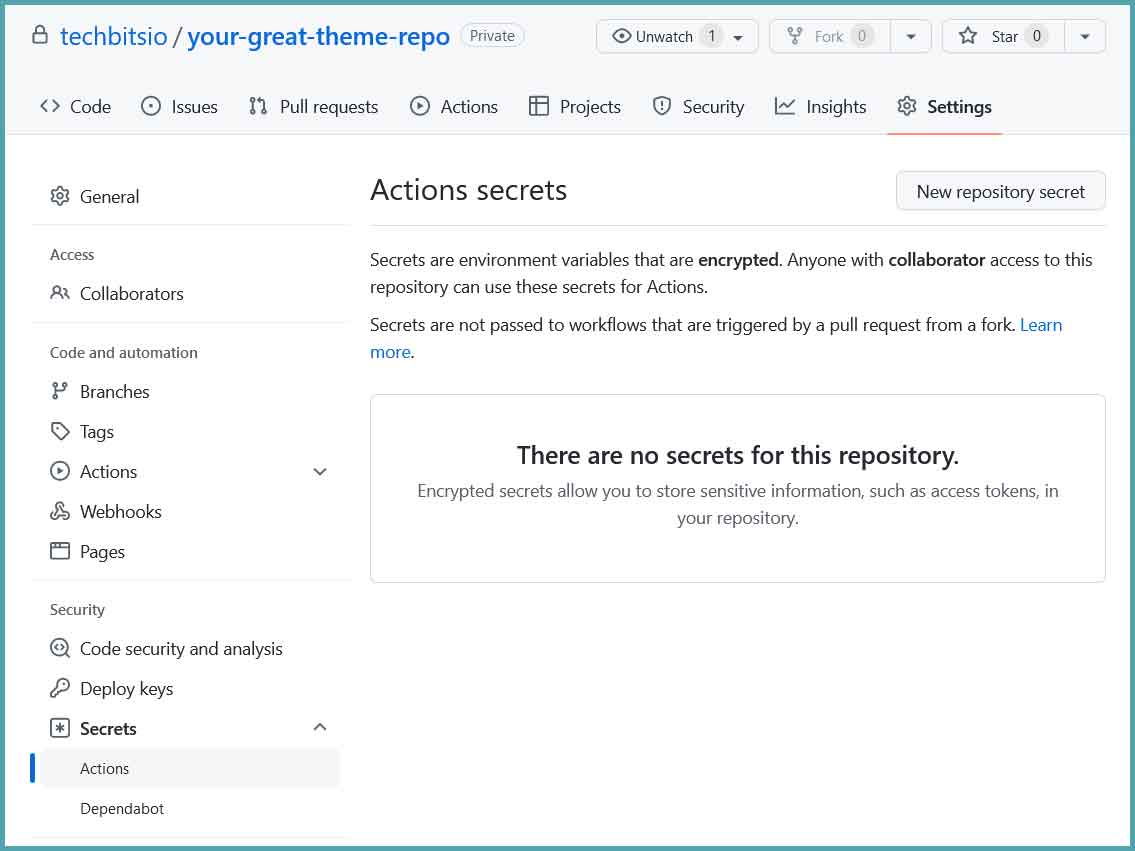
Create two secrets here. The names can be whatever you want, but the Ghost documentation suggests: GHOST_ADMIN_API_URL & GHOST_ADMIN_API_KEY. Use the API URL and API Admin key gathered from Ghost as the secret for these.
Create the Deploy File
In the root of your repository, create a folder called .github (the . is very important), and within that, create a folder called workflows. Within that, create a .yml file (Ghost docs suggests deploy-theme.yml).
If you're using the Github website, in your repository click Add File -> Create new file, and for the name of the file you can enter .github/workflows/deploy-theme.yml to automatically create both directories.
For the contents of the file, you can use the following, but I'd also recommend checking for the latest version number on the Github Marketplace and replace 1.6.1 below as applicable.
name: Deploy Theme
on:
  push:
    branches:
      - main
    paths-ignore:
      - '**/README.md'
jobs:
  deploy:
    runs-on: ubuntu-22.04
    steps:
      - uses: actions/checkout@v2
      - name: Deploy Ghost Theme
        uses: TryGhost/action-deploy-theme@v1.6.1
        with:
          api-url: ${{ secrets.GHOST_ADMIN_API_URL }}
          api-key: ${{ secrets.GHOST_ADMIN_API_KEY }}
Replace the branch name if yours differs from main (but if it's a new repository, it shouldn't do).
If you deviated from GHOST_ADMIN_API_URL & GHOST_ADMIN_API_KEY secret names, ensure you make the same changes here too.
If you're using the web editor, hit 'Commit new file'. Otherwise, save and push it.
As soon as you've done this, within your repo, go to Actions and you'll be able to watch the first run...fail...
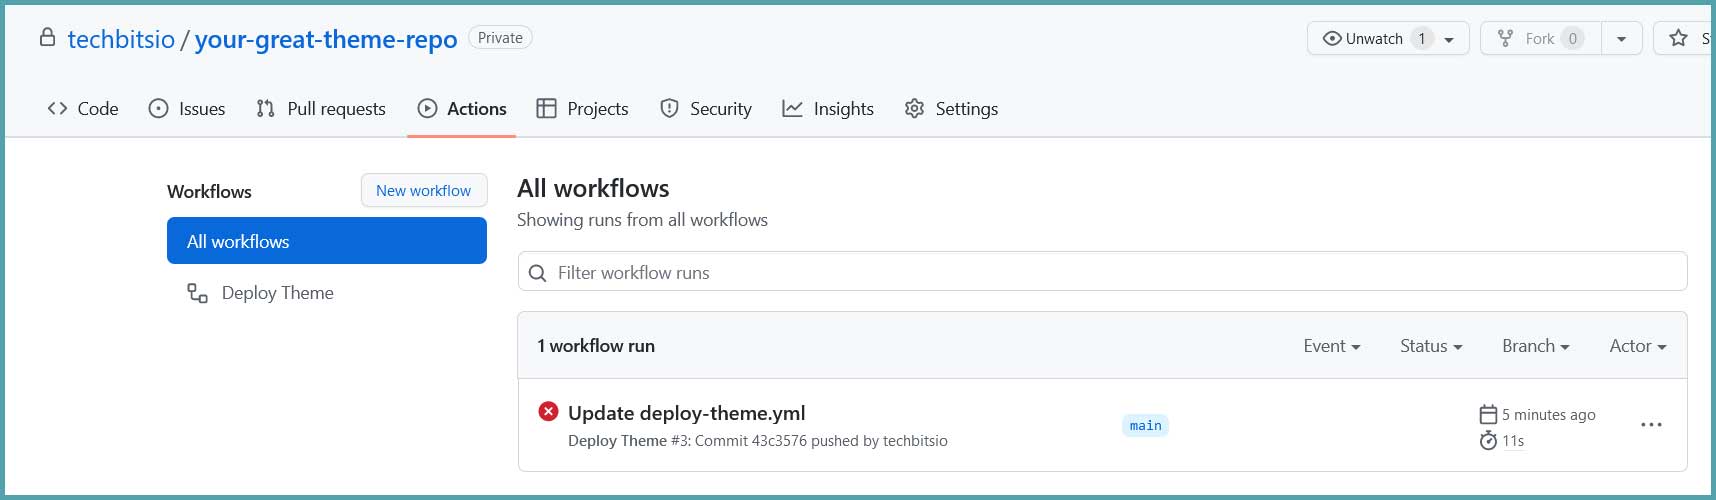
This is expected! We haven't uploaded the theme yet, so it's probably a good thing it failed.
Commit the Theme Directory
While editing files using the Github web interface can be handy when you're without your usual setup, committing changes to Github is best done using one of many git-based tools, after you've worked on them with your favourite code editor.
If you're not familiar with this, Github Desktop is probably the best place to start. Once you've logged in, clone your repository from Github to your computer, copy your theme directory into that folder, and you should see lots of files listed back in Github Desktop, showing all of the files to be added. Add a commit message, and hit Commit, then hit push.
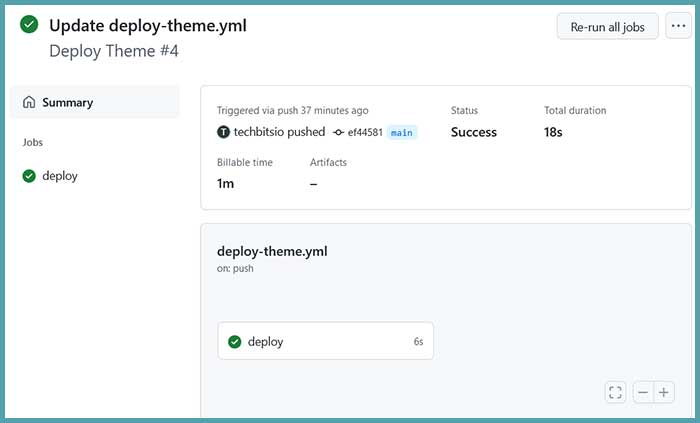
Now go back to Github.com, into your repo actions again, and if all has gone well, you should see a success message.
Activate the Theme
If you had already uploaded this theme (and the directory name matches that in your Github repo), your theme should already be active, and any future changes should be reflected on your Ghost site almost as soon as you commit them.
If not, the last step is to go back to your Ghost admin section, into Design -> 'Change theme' (bottom-left of the window), then the 'Advanced' drop-down in the top-right. Choose ACTIVATE on the applicable theme.
Final Thoughts
Once you have this in place, you might surmise that you don't want every change to be pushed live to your main site. In that case, you could create a new branch in the repository, and add API secrets for a staging site. Once you create a second deploy file (e.g. deploy-staging.yml) in the workflows directory, and set the branch in that file to staging, you'll have a mechanism to test your changes, and once you've approved your own work, merge changes from staging into main to push those changes to the main site.
Using multiple branches in this way reinforces a good development habit, and while you could roll changes back to a previous commit, it's preferable to not need to in the first place!
If you're deploying any other changes to Ghost (theme, or otherwise) using Github actions, let me know in the comments, or @techbitsio.