#mastodon
Mastodon v4.0.0 Upgrade [v4.0.2]
What's new in Mastodon v4.0.0, and how do you upgrade? Read on for the headline features and to see how to get started with Mastodon v4.0.0.

I wrote a few posts (and scripts) last year focused on Mastodon, how to install it, and various surrounding ideas, which were all based on what I’d learnt while creating and running my own instance. A year or so later, and while running the instance was a fun project, the cost and time required for very little benefit (a single user instance) led me to decide to shut the instance down.
I’ve already migrated my account to fosstodon.org/@techbits using Mastodon’s mechanism to notify/move your followers to a new account, and while I’m sure there aren’t many hits to the previous URL, it seems like bad practice to shutter a service and not at least redirect users.
As it’s a single user instance, I want to redirect all traffic to the domain, and using Cloudflare’s free redirect rules or page rules, this is very easy to do.
The caveat to all of the following steps is that traffic needs to run through Cloudflare for the rules/redirects to take effect. Cloudflare can just be used for DNS entries (and there are times where you might want to just use this) so if the page rules/redirects aren’t working, make sure you see orange ‘proxied’ icon for the domain A record.

Within the section for that domain in the Cloudflare console, choose Rules -> Redirect Rules, then ‘Create Rule’. Name the rule and choose ‘All incoming requests’. Set the redirect to ‘Static’. Enter the URL to redirect to, set the status code to 301 and click ‘Deploy’.
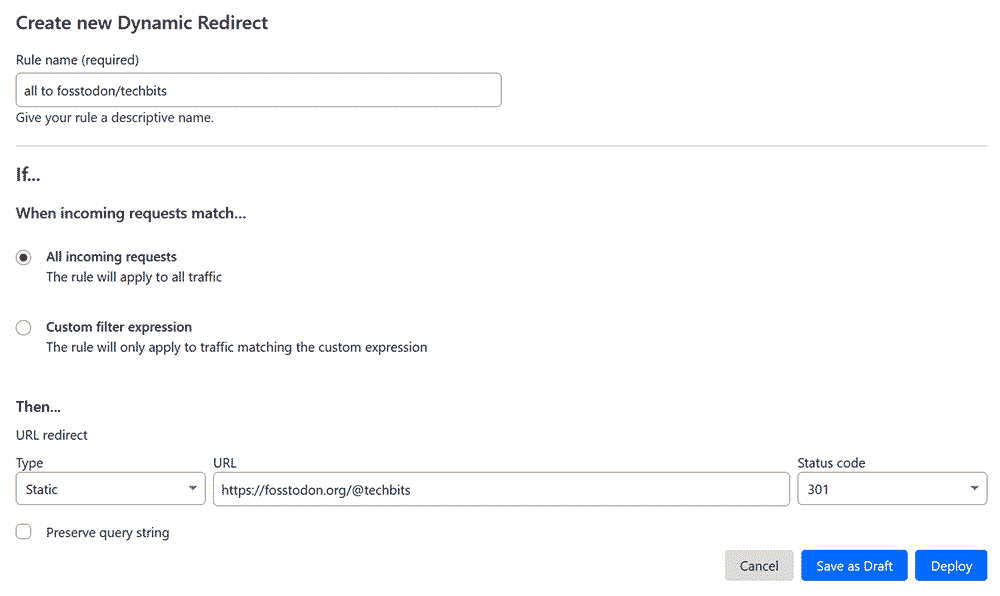
All traffic will now redirect to the new account. If I want to specify a different redirects depending on the destination (i.e., my account URL redirects to a different location than the root domain) then you can use Page Rules…
Instead of Redirect Rules, a Page Rule can be used to either the same effect, or for more granular control.
For a simple redirect, under Rules, choose Page Rules -> ‘Create Page Rule’.
For the URL, enter yourdomain/*, e.g. example.com/* and then in the settings box, choose ‘Forwarding URL’. Set the redirect status code to 301/302 as appropriate, and set the destination address to your new location, then click ‘Save and Deploy Page Rule’.
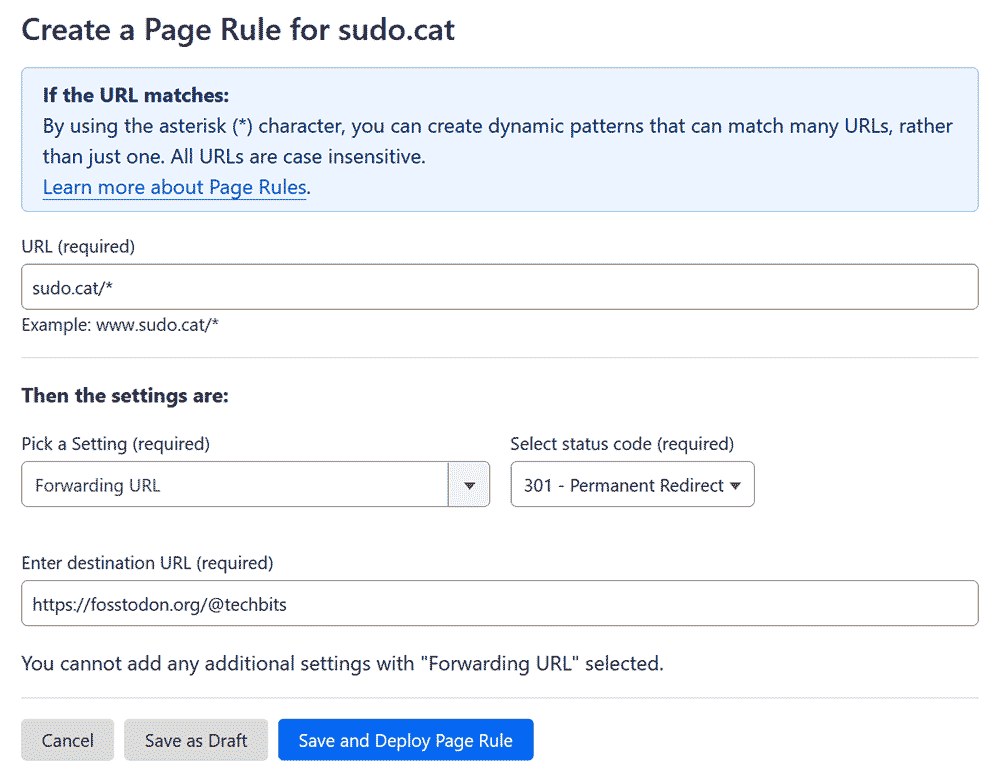
As Cloudflare gives you 3 page rules even on a free account, you could create multiple rules. Realistically, I only need to redirect visits to @techbits and direct post links to the new Mastodon account. Anything else I want to redirect elsewhere (I may even redirect to this post, because, why not?)
To do this, create two rules: One for example.com/@youraccount* to the new account, and then another for example.com/* to the alternate location. If you create them in a different order, make sure to change them so the more specific rule is triggered first, otherwise everything will get picked up by the broader rule.

With this rules in place, I can decommission the server without worrying about inbound traffic. The next step is to create a Ghost rule to rewrite all of the instances of the old url/account to new!
If there’s anything I’ve missed/messed up, please let me know in the comments, or send me a message at @techbits@fosstodon.org.
Share this article:
What's new in Mastodon v4.0.0, and how do you upgrade? Read on for the headline features and to see how to get started with Mastodon v4.0.0.

This guide will show you how to serve content from a Backblaze B2 (S3) bucket via Cloudflare's global CDN using free accounts from both providers
This guide will show you how to add Mastodon content to a Backblaze B2 (S3) storage bucket, and in the process, reduce your server load!