This guide will show you how to add Mastodon content to a Backblaze B2 (S3) storage bucket, and in the process, reduce your server load!
The other day, I published a post on how to use Vultr Object storage (s3) to host your Mastodon attachment files, but of course, there are numerous different providers with S3-compatible API storage, and so today, I'm going to go through how you can get your Mastodon instance to play nicely with Backblaze's B2 storage.

Sign up to Backblaze
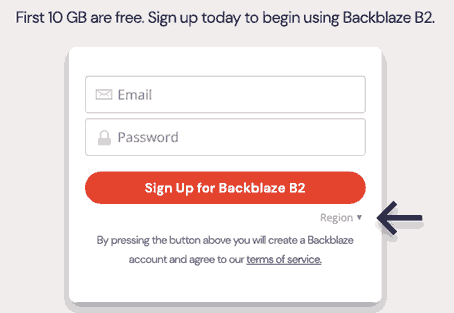
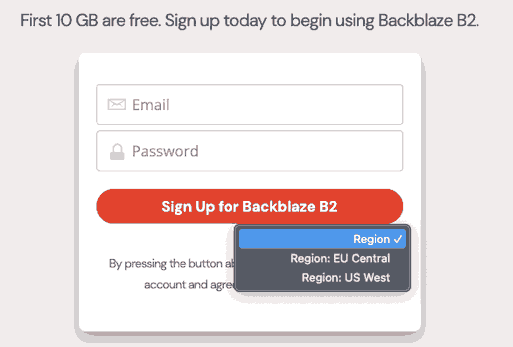
First step if you don't already have an account, is to sign up with Backblaze. On the signup form, make sure you choose the correct region (the option is not really obvious).
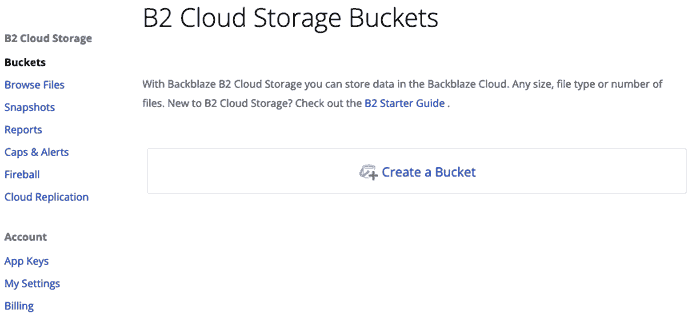
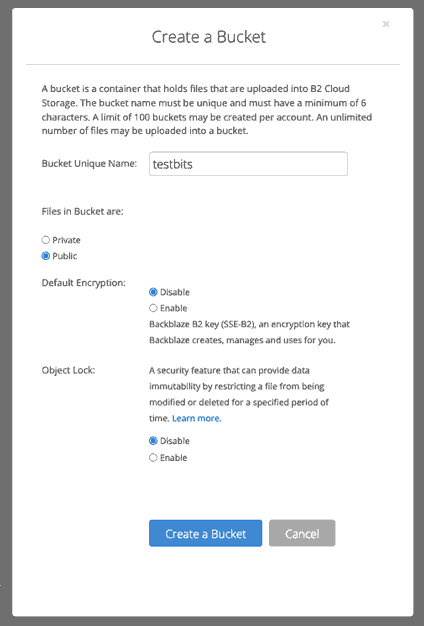
Create a Bucket
Once you've verified your email address and logged in, go to Buckets -> Create Bucket.
Name the bucket (something unique across the Backblaze systems - for the purposes of this demo, I called mine 'testbits'). For the other options, set:
- Files in Bucket are: Public
- Default Encryption: Disable
- Object Lock: Disable (unless you specifically want this)
On the left menu, go to 'Browse Files', click your bucket name and choose 'Upload'.
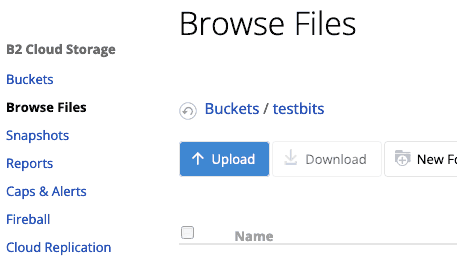
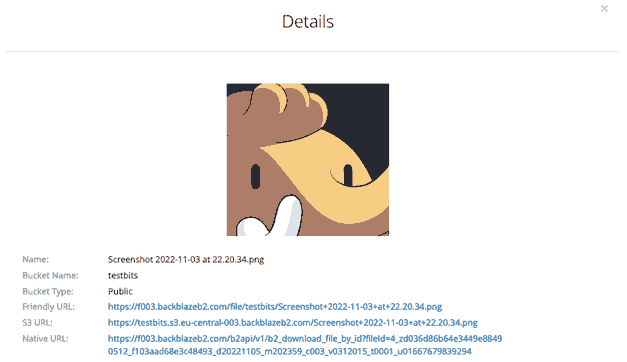
We're uploading a file here (doesn't matter what) to confirm the enpdoint URL. Once uploaded, click on the filename and you'll be shown various URLs. Make a note of the s3 URL - it will be in the format of yourbucketname.s3-endpoint-url
Create an API Key
The last step in the Backblaze account is creating an app key. On the menu, choose 'App Keys' and scroll down to 'Add a New Application Key'.
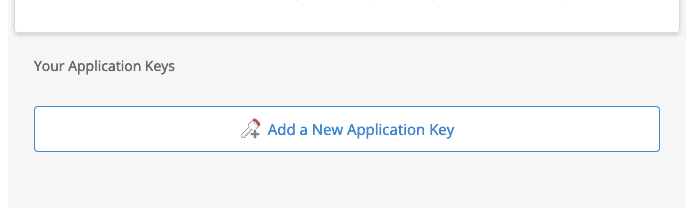
Give it a name, and choose your bucket from the dropdown. For 'type of access' choose 'Read and Write', and leave the other 2 fields blank. Click 'Create New Key'.
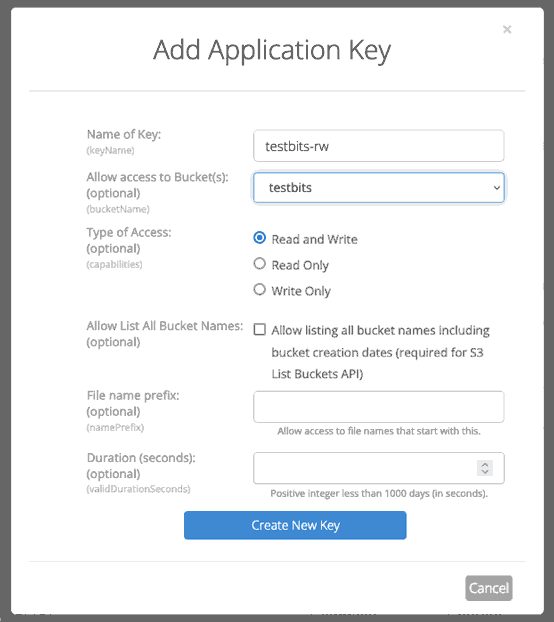
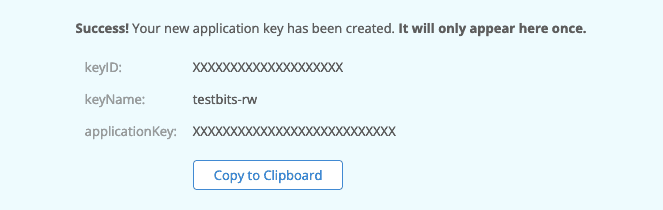
You'll be presented with the ID and key. Make a note of these!
Configure Mastodon
Now we're ready to tell Mastodon to use this new bucket!
If you're following the Mastodon installer, when it asks the question about S3 storage, say 'yes' and choose the Minio option.
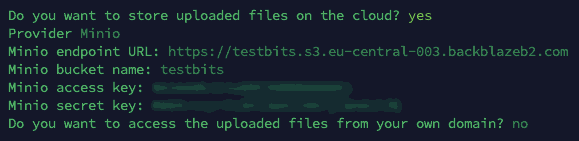
Note 1: for the endpoint URL, use the s3 URL from earlier, but without your bucket name as a prefix. We enter the bucket name afterwards.
Note 2: for Minio access key, use the keyID, and for Minio Secret key, use the applicationKey.
Do you want to store uploaded files on the cloud? yes
Provider Minio
Minio endpoint URL: https://s3.eu-central-003.backblazeb2.com
Minio bucket name: testbits
Minio access key: XXXXXXXXXXXXXXXXXXXX
Minio secret key: XXXXXXXXXXXXXXXXXXXXXXXXXXXXXXXXXXXXXXXX
Do you want to access the uploaded files from your own domain? no
We're saying 'no' to serving files from our own domain, but there will be a future post covering this, so check back soon!
S3_ENABLED=true
S3_PROTOCOL=https
S3_ENDPOINT=https://s3.eu-central-003.backblazeb2.com
S3_HOSTNAME=s3.eu-central-003.backblazeb2.com
S3_BUCKET=testbits
AWS_ACCESS_KEY_ID=XXXXXXXXXXXXXXXXXXXX
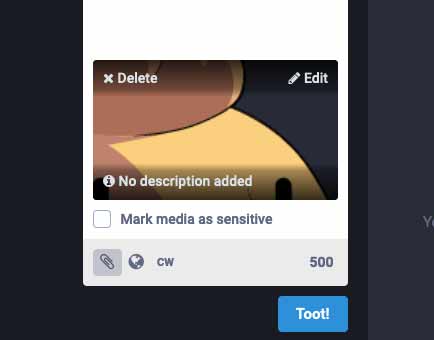
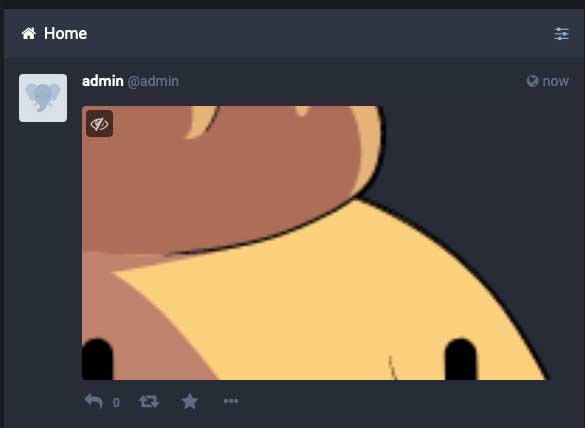
AWS_SECRET_ACCESS_KEY=XXXXXXXXXXXXXXXXXXXXXXXXXXXXXXXXXXXXXXXXComplete the rest of the setup, and when you're able to login, post an image, and if all goes well, it will upload to your new Backblaze B2 bucket!
It can take a few minutes for the file browsing on Backblaze to update and show the new files, but when you check, you'll see the Mastodon attachment file path.
That's it! You've added an S3-compatible Backblaze B2 bucket to your Mastodon instance, and have confirmed that new user-added files are being ingested.
Check back soon for a post on how we can serve these files from our own URL/subdomain, and cache the files to avoid serving more than required.
In the meantime, please leave a comment if you have any questions (or, more likely, I've made a mistake you want to point out). Alternatively, I'm over at @techbitsio.